

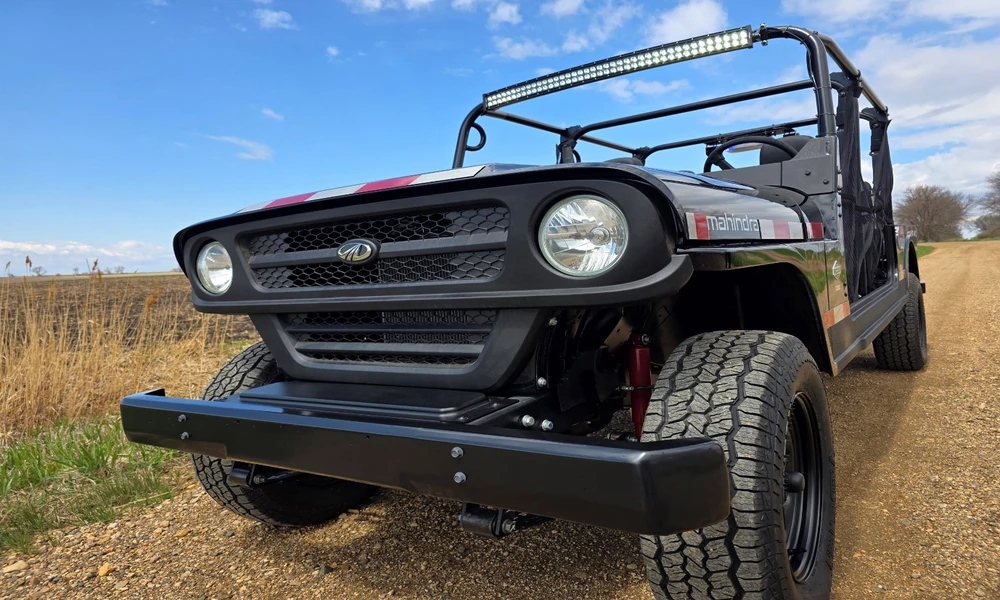
You already know your Roxor’s strengths. What you need now is a plan to pick parts that fit your goals, your trails, and your budget. I evaluate accessories by durability, fit, and the support behind them. I favor parts that make a clear improvement you can feel on day one and that keep working after hard use. If you want a fast starting point, compare roxor accessories from On The Rox Fabrication. They focus on strength, precision fit, and real-world function, which aligns with how I make recommendations.
In this guide I will show you how to set a goal for your build, what to prioritize first, how to stage upgrades in a smart order, and where On The Rox Fabrication stands out for Roxor owners who want capability and reliability.
Start With a Clear Build Goal
Decide what you want your Roxor to do. Then build for that job.
- Work rig that tows, hauls, and runs daily
- Trail explorer that needs protection, traction, and smooth control
- Dual-use machine that can meet street requirements in your area
Write down terrain, payload, and any street-legal needs. This list will guide every purchase and prevent random spending.
Protect the Vehicle First
Armor keeps your rig honest. It also saves money long term.
- Skid plates and component armor
- Oil pan skid plates protect a critical weak point and pay for themselves the first time you drag over rock or stump.
- Rear quarter panel armor
- On The Rox Fabrication builds heavy-duty 3/16-inch aluminum panels that match the Roxor body and absorb real hits. They keep sheet metal straight and clean over time.
- Bumpers, sliders, and exterior armor
- Choose pieces that spread impact loads and offer recovery points. Look for clean welds, tight fit, and strong mounting.
I start with armor because it protects every later upgrade.
Fix Ride and Handling
You want control, not punishment.
- Shocks
- OESpectrum shock pairs from On The Rox improve ride quality without making the truck floaty. They help with both washboard roads and uneven trails.
- Suspension hardware
- Keep bushings, mounts, and alignment true. Small parts matter for feel and tire life.
- Side steps
- Black powder-coated side steps make access easier and also add a small layer of rocker protection.
Tune for the load you carry most often. Consistency beats an extreme setup you hate to drive.
Strengthen Drivetrain and Traction
Power means very little if you cannot put it down.
- Manual locking hubs
- Simple, tough, and they reduce wear when unlocked on pavement or gravel.
- Gears, axles, and drivetrain upgrades
- Choose ratios that match tire size and terrain. If you tow, gear for torque and steady throttle control.
- D-ring mounts and recovery points
- Recovery starts with safe anchors. Add these early.
Think of drivetrain upgrades as insurance for both parts and confidence.
Build Utility That You Use Every Day
Make the machine more useful with practical add-ons.
- Bolt-on receiver hitches for towing and cargo trays
- Telescoping rack systems and cargo carriers
- Carry tools, coolers, and spares securely without blocking visibility.
- Heavy-duty tire mounts
- Support the weight of larger spares without body stress.
Keep weight as low and as centered as possible. Balanced cargo improves handling and braking.
Plan for Street and Safety Needs
If you aim for street use, plan the electrical and visibility pieces together.
- Turn signal harness conversion
- On The Rox offers an in-house system with a column-mounted switch, LED signals, and parts that integrate with the factory harness. Their instructions are clear, and typical install time is about two and a half hours.
- Side mirrors and windshields
- Powder-coated steel mirrors hold position and improve safety. A proper windshield reduces fatigue and keeps dust out.
- Lighting systems
- Choose lighting that avoids glare and adds useful beam patterns. Wire it cleanly with the right harnesses and fusing.
Build for compliance and safety first. Extra lights are optional. Signaling and mirrors are not.
Comfort and Usability Pay Off
You drive better when you are comfortable.
- Doors, tops, enclosures, and sport tops for weather protection
- Interior accessories for small-item storage, switches, and clean wiring paths
These upgrades do not grab attention, but they improve your day every time you drive.
Sequence Your Build and Budget
Do not buy everything at once. Stage it in a smart order.
1. Armor and recovery points
2. Suspension and shocks
3. Drivetrain strength and gearing
4. Utility and cargo solutions
5. Street-legal systems and lighting
6. Comfort, enclosure, and interior
Test after each stage. Address any new weak link before moving on.
Why I Recommend On The Rox Fabrication
They design and build parts with a fabricator’s mindset. Their catalog covers the full Roxor platform, which makes planning a build easier because pieces are designed to work together. The highlights for me are:
- Precision-built armor that fits clean and protects where it matters
- Practical upgrades like receiver hitches, racks, and tire mounts for daily use
- Thoughtful electrical solutions, including a Roxor-specific turn signal harness
- Suspension pieces such as OESpectrum shock pairs for steady control
- Clear install guides that help you finish work right the first time
They operate out of Montana under Westfab Custom Fabrication, which has deep roots in off-road and custom builds. That experience shows in the details and materials they choose.
Installation Tips That Save Time
- Read the instructions and lay out hardware before you start
- Test-fit parts loosely, then torque to spec in sequence
- Use anti-seize on stainless hardware and thread locker where called out
- Protect wiring with loom and correct grommets
- After your first shakedown, recheck all fasteners
A careful first install prevents noise, misalignment, and early wear.
Three Build Templates You Can Adapt
Trail-first protection
- Oil pan skid, rear quarter armor, sliders, front and rear bumpers
- OESpectrum shocks, manual hubs, D-ring mounts
- Mirrors and windshield for visibility
Work and tow
- Receiver hitch, cargo tray or rack, heavy-duty tire mount
- OESpectrum shocks tuned for load, drivetrain upgrades for torque
- Side steps, interior storage, lighting for early and late hours
Dual-use with street needs
- Turn signal harness conversion, mirrors, windshield
- Skid plates, quarter armor, basic bumpers
- Rack system for weekend cargo, comfortable sport top
Pick the template closest to your use, then tweak as you learn what you like.
Bottom Line
Choose parts that match your goal, protect the truck first, and stage upgrades in a logical order. I trust catalogs that show depth, fit, and clear instructions. That is why I point Roxor owners to On The Rox Fabrication for practical choices that stand up to real use. Build with intent, test often, and your Roxor will stay ready for the next job or the next trail.
